Sending a custom Thank You email after a purchase is an effective way to express appreciation, reinforce brand loyalty, and keep the connection going beyond the transaction. Building a relationship with customers starts with thoughtful, personalized communication.
Customize this message, it’s time to create a memorable experience that makes customers feel valued and encourages them to return.
Requirements for setting up a custom Thank You email
To set up a custom Thank You email after a WooCommerce purchase, you’ll need:
- Free Notification Plugin — the core of our plugin, which you can download for free from the plugin repository.
- Notification: WooCommerce integration with the Notification plugin.
Custom Thank You email for WooCommerce purchases — step by step
A personalized “Thank You” email after a purchase goes a long way in building positive customer relationships. It shows that you value each customer individually, creating a memorable touchpoint that sets your brand apart.
This thoughtful follow-up not only expresses appreciation but also opens the door for future interactions by leaving a lasting, positive impression. Setting up an automated custom “Thank You” message with Notification ensures that every customer feels acknowledged, enhancing their overall shopping experience with your brand.
Follow these steps to set up a seamless and impactful “Thank You” email for WooCommerce purchases.
Step 1: Disable WooCommerce’s default complete order email
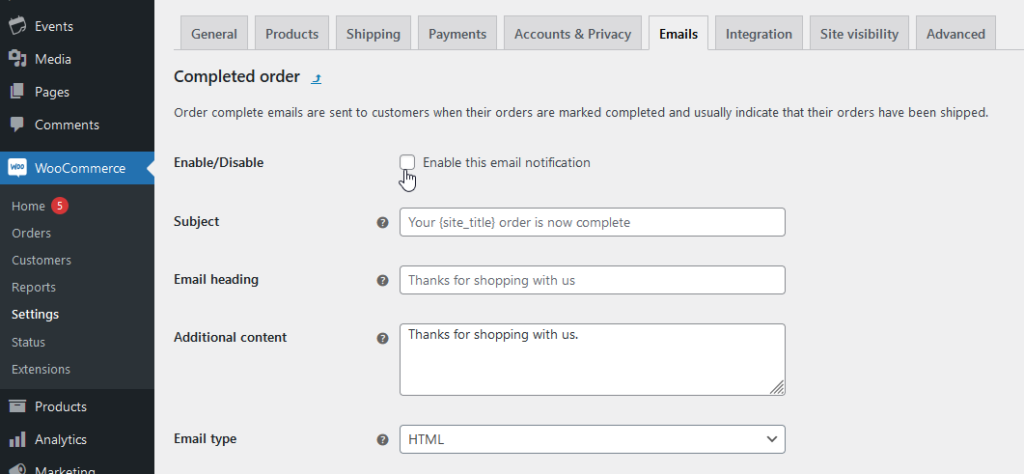
1. Go to WooCommerce > Settings > Emails in your WordPress dashboard.
2. Find the “Complete order” email and disable it. This ensures that your custom “Thank You” message will be the only one sent, preventing duplicate emails.

Step 2: Create a new notification for completed orders
1. In your dashboard, add a new notification.
2. Select the “Order completed” trigger, which will activate this notification once the order is marked as completed in WooCommerce.

Step 3: Select the email carrier
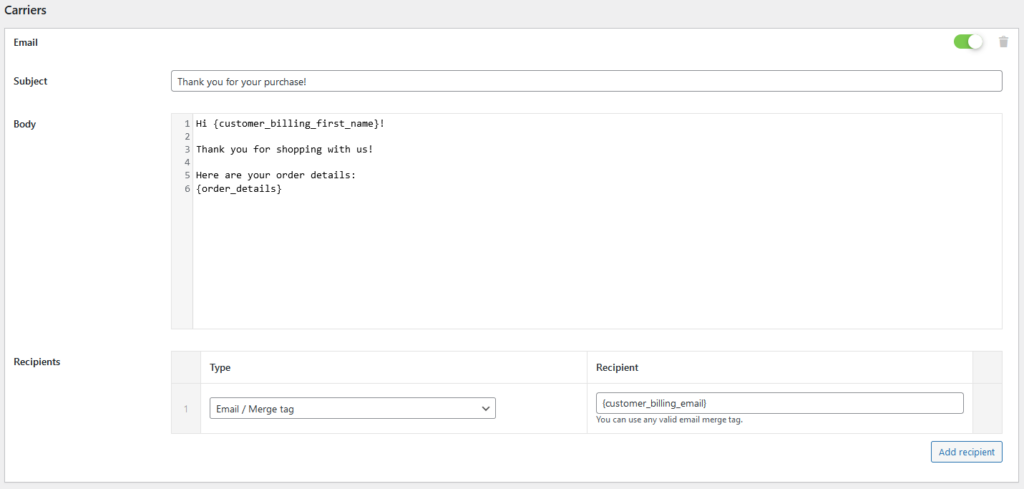
1. Choose Email as the carrier for this notification.

2. Configure the carrier settings if needed, such as the sender name and email, to align with your brand.
Step 4: Set up your custom “Thank You” message
1. Write a personalized message that expresses gratitude for the customer’s purchase. Use a friendly, welcoming tone to build rapport.
2. Use merge tags to automatically include details like the order number, customer’s name, and items purchased, making the message feel tailored and relevant.

3. Add the customer’s email address as the recipient to ensure the message is sent directly to them.
Step 5: Save and activate the notification
After configuring all settings, save the notification. Your WooCommerce site will now automatically send this custom “Thank You” message when an order is completed, helping you connect with customers immediately after their purchase.
How Notification supports WooCommerce alerts
Notification goes beyond “Thank You” messages, enabling you to engage customers with updates on promotions, new products, exclusive discounts, and transactional information. With multichannel support, you can reach customers via SMS, Slack, and email, adapting your communication to their preferences.
For an added touch, integrate Pretty Email to design beautifully branded email templates, enhancing your message’s appeal and reinforcing your brand identity. Notification turns your WordPress site into a comprehensive customer engagement tool, helping you build loyalty and keep customers connected with relevant, timely updates across all channels.
