Learn how to send Email notification on comment reply using the free Notification plugin. You can use this approach to email anyone who needs to know about a new reply in existing comments.
Watch this step-by-step video tutorial or scroll down for the written guide with screenshots.
Video tutorial How to Send Email Notification on Comment Reply
Guide
Install the Plugin
If you already have the plugin installed you can skip to the next step
You can download the plugin directly from your WordPress Dashboard.
WordPress Dashboard ⇒ Plugins ⇒ Add new ⇒ Notification – Custom Notifications and Alerts for WordPress.

Add a New Notification
You need to define a new notification so the plugin knows when it needs to send it and to who.
Name the Notification
In order to add a new notification, you will need to go to Notifications ⇒ Add New Notification.
On the new screen, at the top you can name your new notification, it’s recommended to name it to something that you will remember. You can name it however you like, don’t worry this will not appear anywhere else.
Select the Trigger
The next field you need to fill in is the Trigger. This is basically most of the things you can do in WordPress. Do you want to receive an email when a user signs up? Or do you want to be informed when one of your editors publishes a new post? Or when someone buys a new product? Don’t worry, we got you covered.
For this tutorial, we will select Comment replied. This essentially means that each time someone else replies to an existing comment on our WordPress site, we want to send an email notification to the person who posted the first comment.
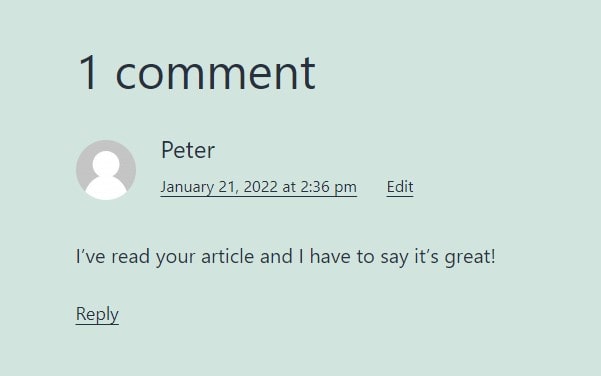
For example, in one of my posts, I have a comment by a user called Peter. Then a new user called Kevin goes to my post and sees Peter’s comment. Kevin wants to reply to Peter’s comments so when Kevin does, I want to make sure that Peter receives an email notification that someone replied to his comment.
Important: you can only select one trigger per notification. In case you want to select an additional trigger you will need to add a new notification.
Select the Carrier
This tutorial covers only Email carriers (in case you are interested in a different carrier you can see our tutorials here).
The next option you need to select is Carriers, in other words, which is basically where you want to receive your notification. For this example, we will use Email as our carrier.
Email Setup
So far we have named our notification, we selected our trigger and email as our carrier. So now let’s set up the content of this email, and who will be the recipients of it.
When you select Email in the carriers section you will see new options to be filled:
Subject
This is the name of the email. In case this email is for your users or customers remember to give a relevant name because it is the first impression, it is the reason the recipient will, or will not open it.
Body
The next part you need to fill in the body of the email. This works as a traditional text editor. You can personalize it as you want. You can add links, modify the size of the fonts, change font color, and many more.
If you want you can use this template:
Subject: Someone replied to your comment in the post {post_title}!

Body:

Hello {parent_comment_author_user_display_name},

Someone replied to your comment in the post: {post_title}!:

The reply to your comment is:

Your comment: {parent_comment_content}

Reply by {comment_author_user_display_name}: {comment_content}

If you want to read and reply to this comment you can do it here: {post_permalink}

Cheers!
Merge Tags (Optional)
Depending on the trigger you selected in the steps before, in the right sidebar of the window, you will see some options called Merge Tags.
Merge Tags are a tiny bit of dynamic information that is taken automatically by WordPress. For example, when someone signs up to your website, most likely he already provided his name or email address. Instead of manually typing each time of the emails, we can use those merge tags to generate the content dynamically.
For example, for this Comment Reply Notification Email, I will use the tags:
- {post_title}: it will show the title of the post where there is a new comment
- {parent_comment_author_user_display_name}: it will show the name of the person who will receive the email
- {parent_comment_content}: it will show the original comment that the user who will receive the email made
- {comment_content}: it will show the new reply to the existing comment
- {post_permalink}: it will show the link of the post where the comments were made
- {comment_author_user_display_name}: it will show the name of the person to reply to an existing comment
The available merge tags for the trigger Comment added are:
COMMENT
- Comment ID: {comment_ID}
- Comment content: {comment_content}
- Comment HTML content: {comment_content_html}
- Comment status: {comment_status}
- Comment type: {comment_type}
- Is Comment a reply?: {comment_is_reply}
- Comment date and time: {comment_datetime}
COMMENT ACTIONS
- Comment approve URL: {comment_approve_action_url}
- Comment trash URL: {comment_trash_action_url}
- Comment delete URL: {comment_delete_action_url}
- Comment mark as spam URL: {comment_spam_action_url}
COMMENT AUTHOR
- Comment author IP: {comment_author_IP}
- Comment author user browser agent: {comment_author_user_agent}
- Comment author URL: {comment_author_url}
- Comment author user ID: {comment_author_user_ID}
- Comment author user email: {comment_author_user_email}
- Comment author user display name: {comment_author_user_display_name}
- Comment author user avatar: {comment_author_user_avatar}
- Comment author user avatar url: {comment_author_user_avatar_url}
PARENT COMMENT
- Parent comment ID: {parent_comment_ID}
- Parent comment content: {parent_comment_content}
- Parent comment status: {parent_comment_status}
- Parent comment type: {parent_comment_type}
PARENT COMMENT AUTHOR
- Parent comment author IP: {parent_comment_author_IP}
- Parent comment user agent: {parent_comment_user_agent}
- Parent comment author URL: {parent_comment_author_url}
- Parent comment author user ID: {parent_comment_author_user_ID}
- Parent comment author user email: {parent_comment_author_user_email}
- Parent comment author user display name: {parent_comment_author_user_display_name}
- Parent comment author user avatar: {parent_comment_author_user_avatar}
- Parent comment author user avatar url: {parent_comment_author_user_avatar_url}
POST
- Post ID: {post_ID}
- Post permalink: {post_permalink}
- Post title: {post_title}
- Post slug: {post_slug}
- Post content: {post_content}
- Post excerpt: {post_excerpt}
- Post status: {post_status}
- Post Type: {post_type}
- Post creation date and time: {post_creation_datetime}
- Post modification date and time: {post_modification_datetime}
POST AUTHOR
- Post author user ID: {post_author_user_ID}
- Post author user login: {post_author_user_login}
- Post author user email: {post_author_user_email}
- Post author user nicename: {post_author_user_nicename}
- Post author user display name: {post_author_user_display_name}
- Post author user first name: {post_author_user_firstname}
- Post author user last name: {post_author_user_lastname}
CUSTOM FIELDS: only available with the Custom Fields extension.
Cool Tip: You can use these merge tags in both the Subject and the Body of the email.
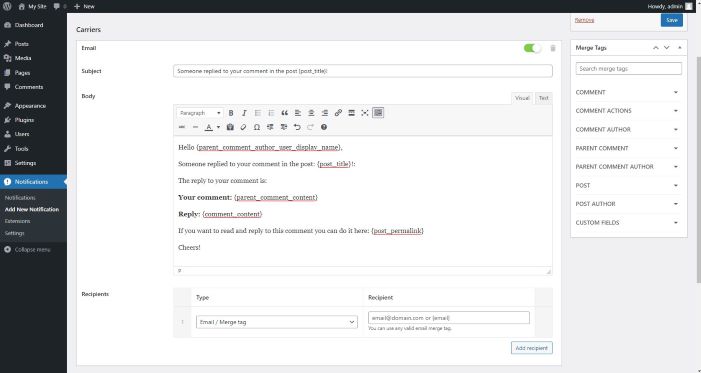
Recipients
The last step in setting the Email Notification is to include the recipients of this email. You will see two columns: Type and Recipient.
| Type | Recipient |
| Email/Merge Tag | You can write here any email that you want, for this tutorial we will use the merge tag {parent_comment_author_user_email} Useful for: general and automatic repetitive actions like sending automatically a Welcome Email to each new subscriber. |
| Administrator | This can’t be changed, this will be by default the administrator of the website. Useful for: informing an admin of the site about an important update or error in the website. |
| User | A dropdown of existing users, you can only select one option. Useful for: informing a specific user about a change on his/her account. |
| User ID | You need to use a valid user ID, or you can use the merge tag {user_ID}Useful for: informing specific users about a change on their account. |
| Role | A dropdown of existing roles on the WordPress Site, you can only select one option. Useful for: informing a change to a specific group of users. |
Tip: you can add as many recipients as you want
For this tutorial, we will use the merge tag {parent_comment_author_user_email} which means that each time someone else replies to an existing comment on our WordPress site, we want to send an email notification to the person who posted the first comment.
After filling the recipient’s fields just click save.
Test Your New Comment Reply Notification
An additional final step that is recommended is to test your comment reply notification.
To do this you can just simply go to an existing post in your WordPress site which has an existing comment and simply add a test reply.
Let’s go back to our previous example of Peter and Kevin. I will assume that I’m Peter and I will receive an email notification in my email [email protected]. After Kevin replies to my comment (and after the comment is approved by the site owner), I will receive your personalized email in seconds!
Important: the notification will only be sent after the new comment has been approved by the website admin! Otherwise, it will not be triggered!
And that’s it! That’s all you need to set up a new Comment Reply Notification.