Are you annoyed by all those WordPress emails, notifying you about every single post or comment? With Scheduled Triggers (a Notification Plugin extension), you can build powerful and personalized scenarios for your very own WordPress notifications.
In this article, you will learn how to:
- Install free WordPress Notification Plugin and set it up.
- Add powerful Extensions.
- Schedule Triggers and receive notifications how and when you want them.
Inbox zero with all those emails from WordPress? Yeah, right! We’ve all been there, but there is a super-simple solution – combine Notification Plugin for WordPress with our extensions and build your own way of receiving crucial information from your WordPress website.
Before we start, you really need to know what a Notification Plugin is. It is an easy-to-use and customizable plugin to give you control over your WordPress notifications. Notification Plugin is free and gives you basic (but still awesome!) functionality, with email customization, marge tags and different Triggers.
With our paid Extensions, you can do even more – like setting up a schedule to receive notifications on a given time of day, or adding different notification Carriers (Slack, Push, Mailgun, you name it).
Let’s get moving, we covered alternative solutions below!
Scheduling WordPress Notifications
Start with installing the Notification Plugin. If you already have a plugin installed, skip to number 2.
1. Install and set up Notification Plugin
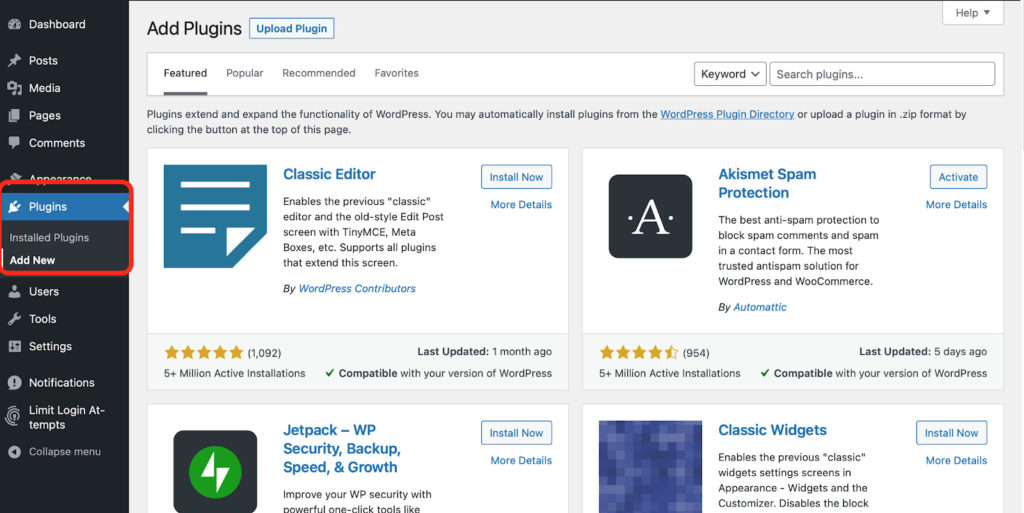
Download and activate the free Notification Plugin from WordPress.org. In the free version, you get email notifications and webhook carriers.

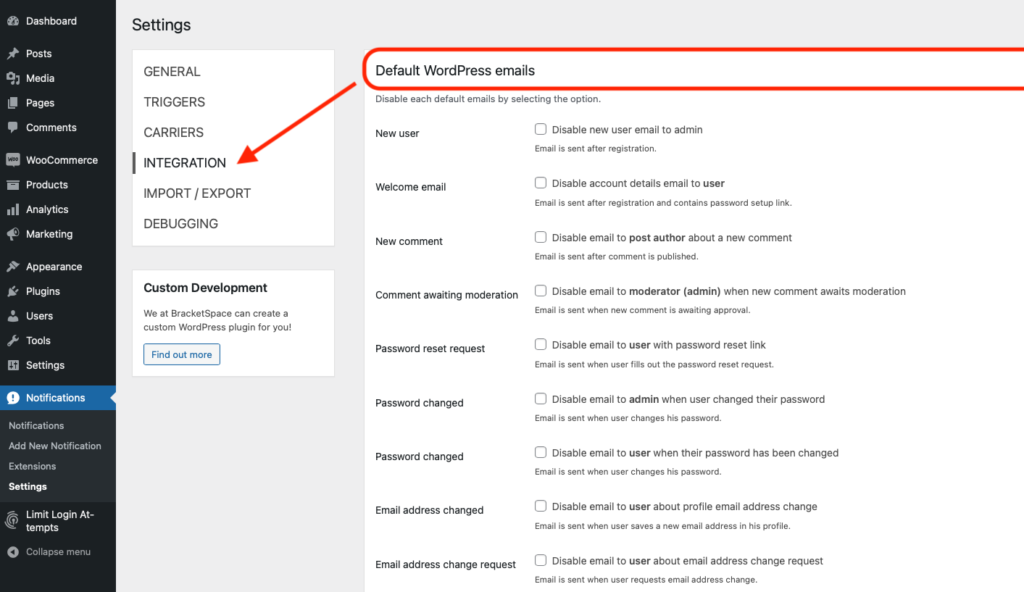
PROTIP: You can disable default WordPress notifications emails from Notification Plugin settings. Works perfectly for the users who want to control all the notifications within Notification Plugin.
2. Add Scheduled Triggers Extension
Open Notifications menu from the sidebar. You can find your notifications, settings, and extensions there.
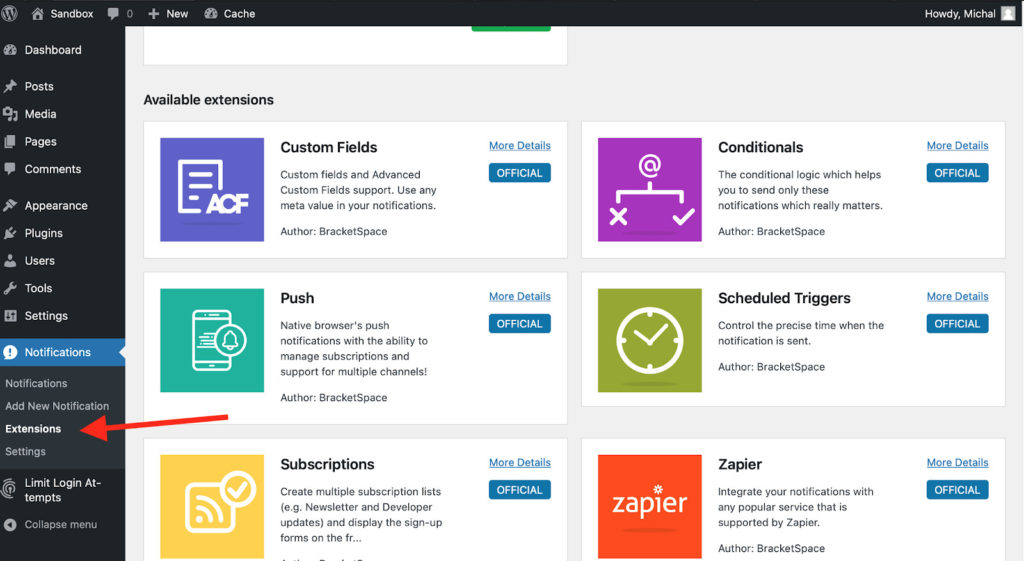
Click Extensions and choose Scheduled Triggers. By selecting More Details, you’ll be transferred to BrackeSpace’s plugin page. You can buy a single Extension or couple Extensions in a bungle (you get a 14-day money-back guarantee, no question asked).


Scheduled Triggers – how to
Your Notification Plugin and Scheduled Triggers Extension are now all installed. Last thing you need to do is to set up our very own notifications’ scenario.
What is a Trigger and a Carrier?
There are two basics of Notification Plugin:
- Trigger is an action that starts the notification chain.
- Carrier is your notification destination.
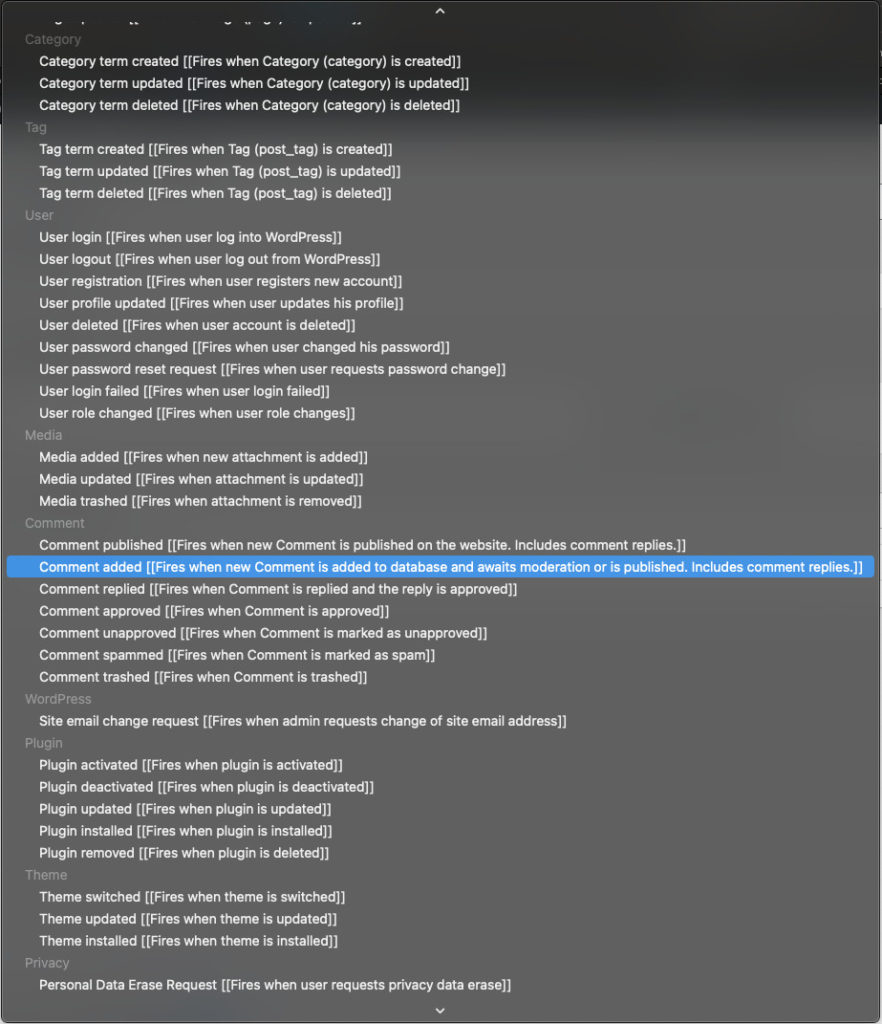
Triggers are put into different categories. For example: in the Post trigger category, you find triggers related to posts, like Adding a new Post. When adding different extensions, the Trigger list grows even more.
Carrier can be a simple email, but also 3rd party apps like Slack, Twilio, Discord, or Twitter.
Scheduled Notification – setting up
The difference that Scheduled Notification Extension makes, is that you can add a timeframe to your notification.
For example, you’d like to send marketing emails to new users after a certain amount of time after registration.
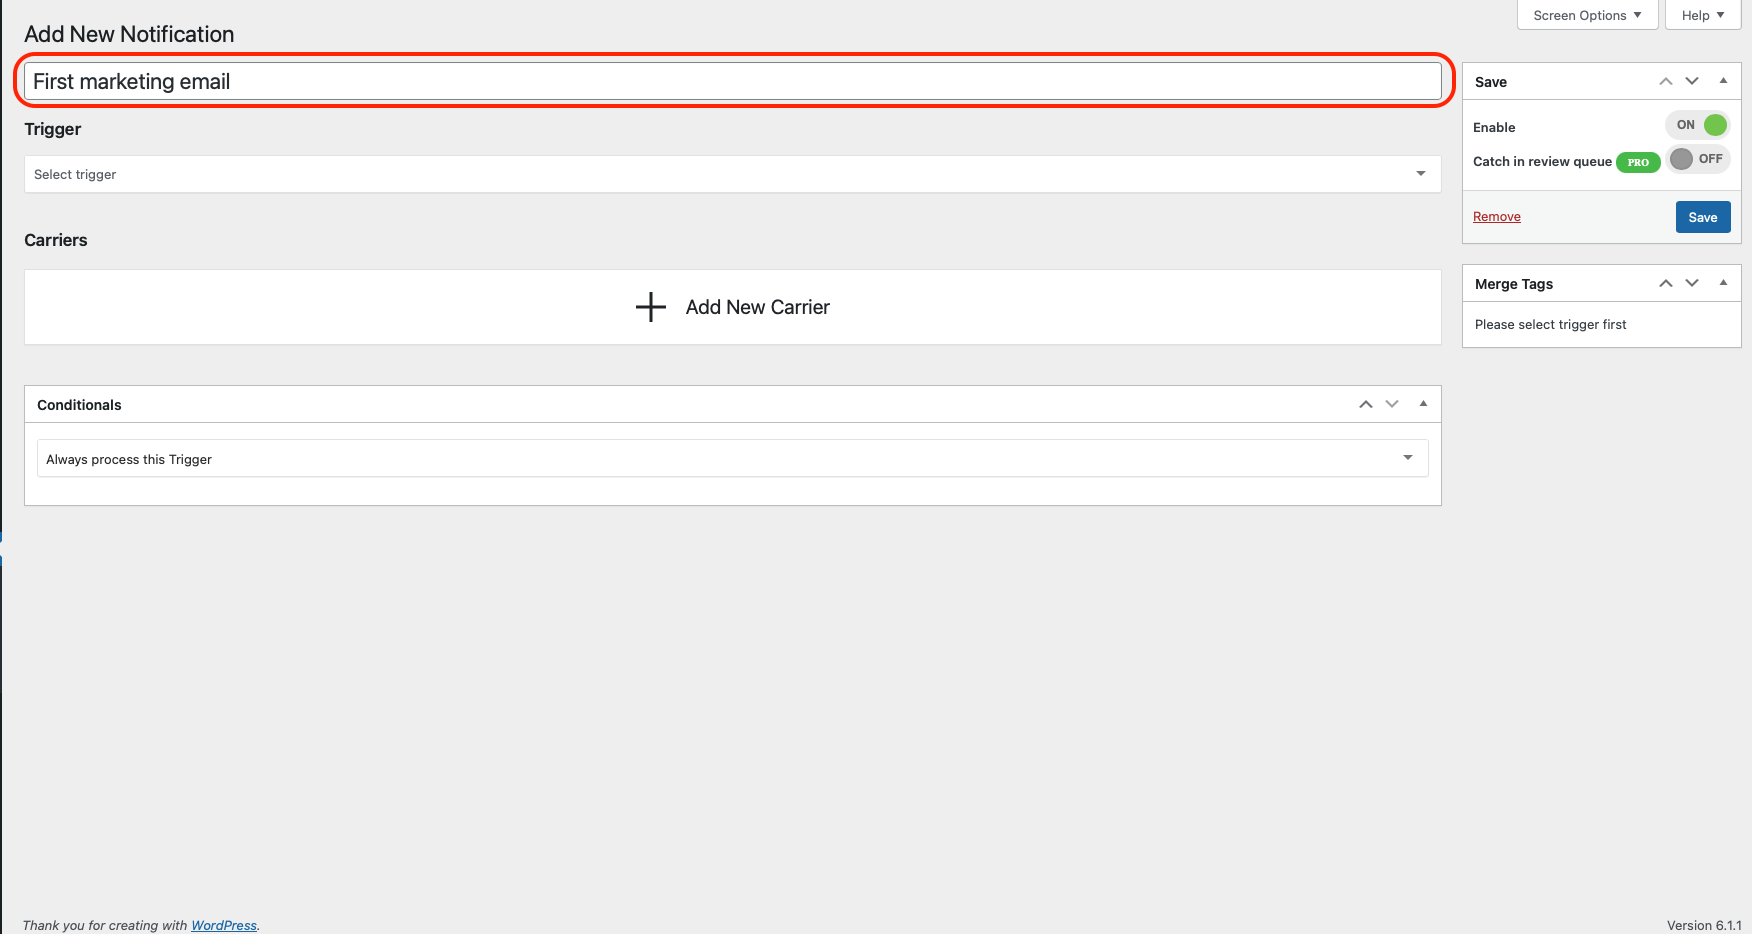
- Open > Add New Notification.
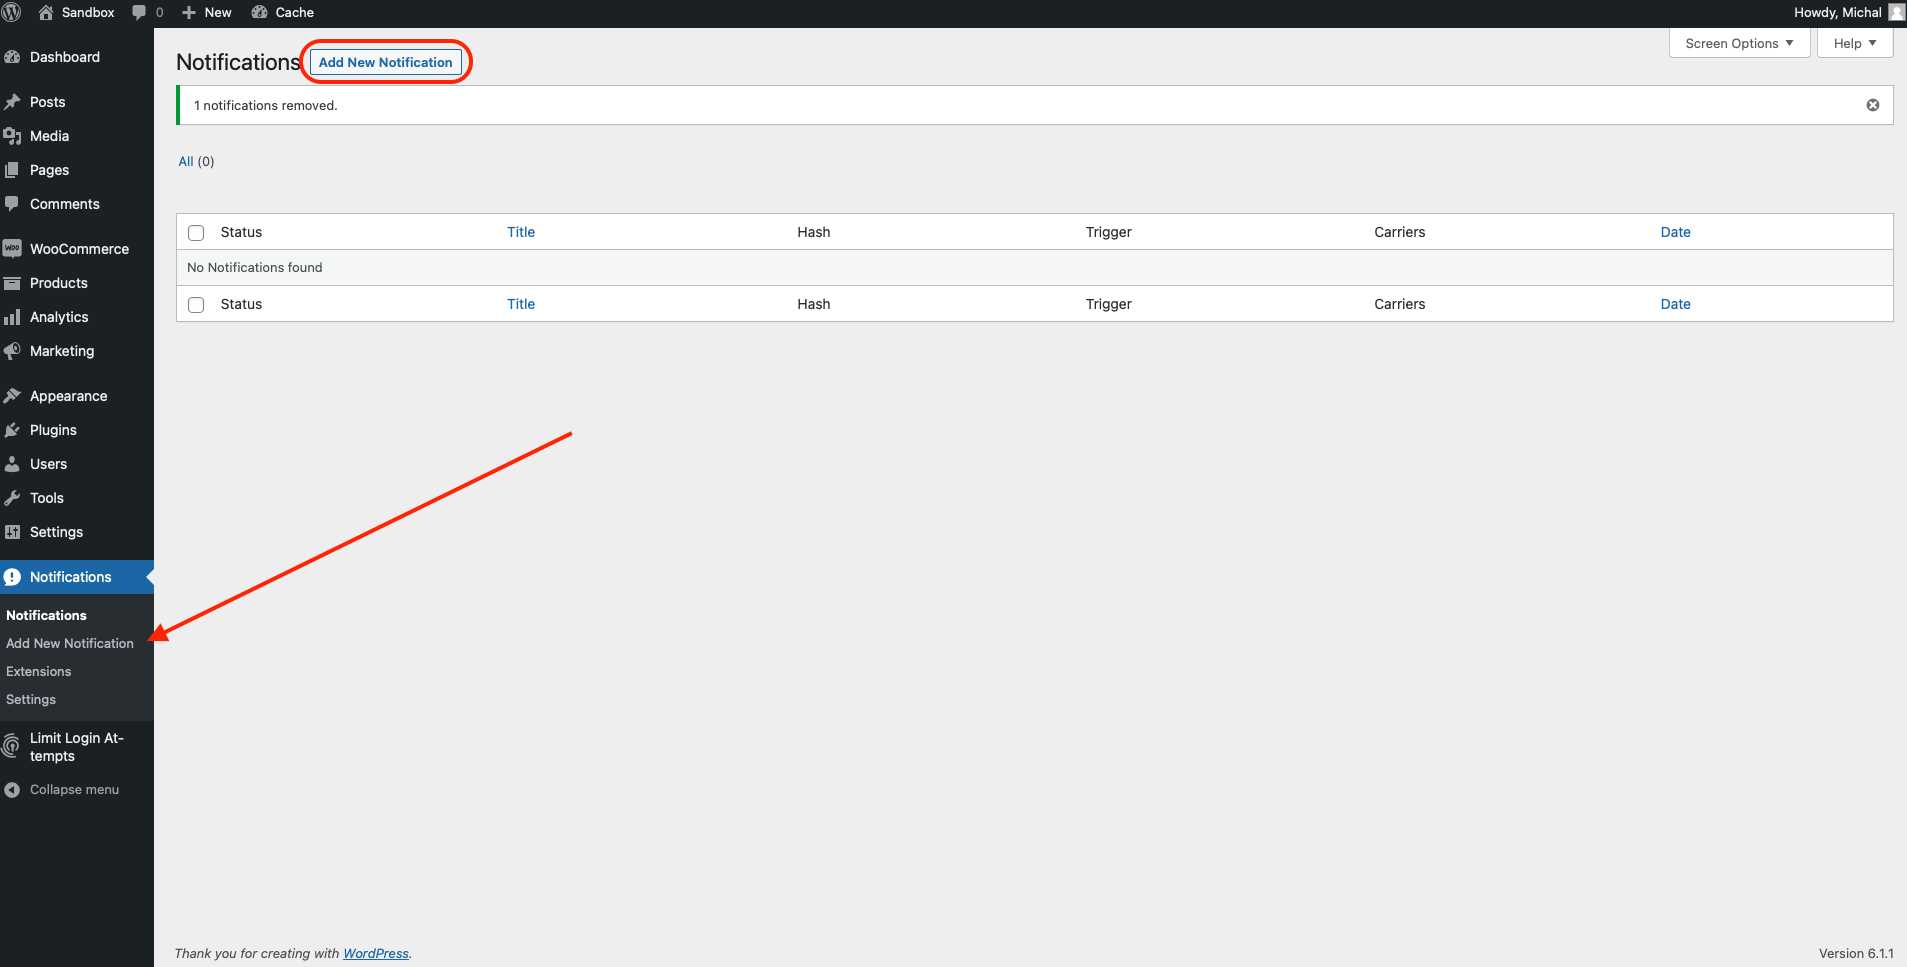
- Give your notification a name, for example: First marketing email
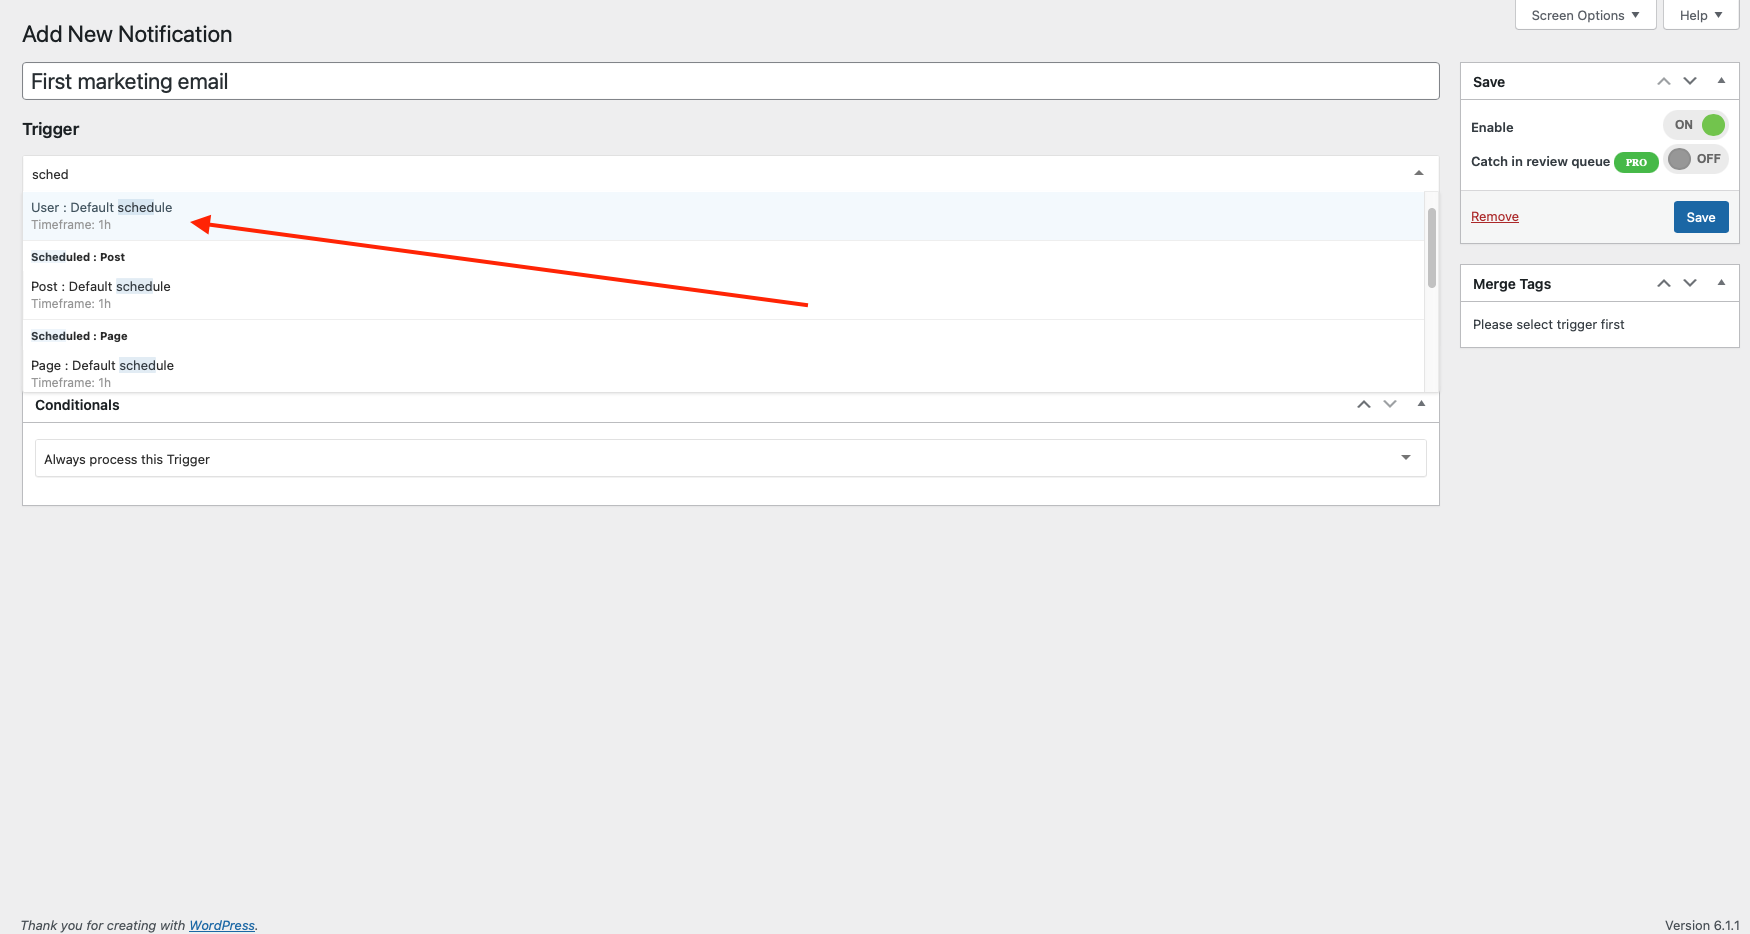
- Select a Trigger > User : Default schedule
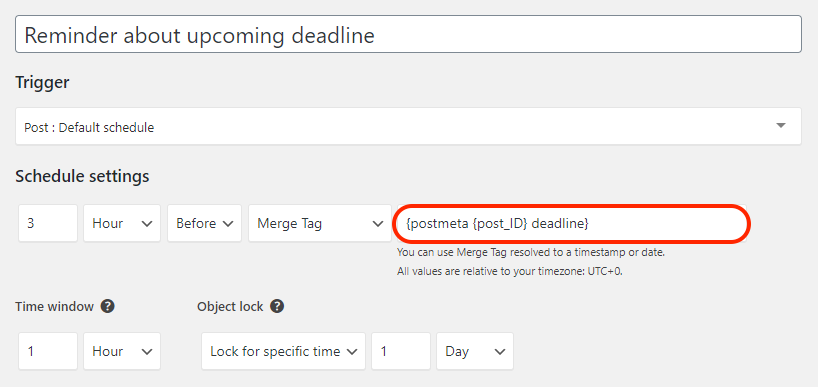
- Set up a Schedule > 3 Days After Registration Date.

You’re almost done. Before adding a Carrier, you need to define a time window.
What is a “time window”?
Glad you asked. Time window defines a range within your object (in this example – a new user registration) can spark a trigger.
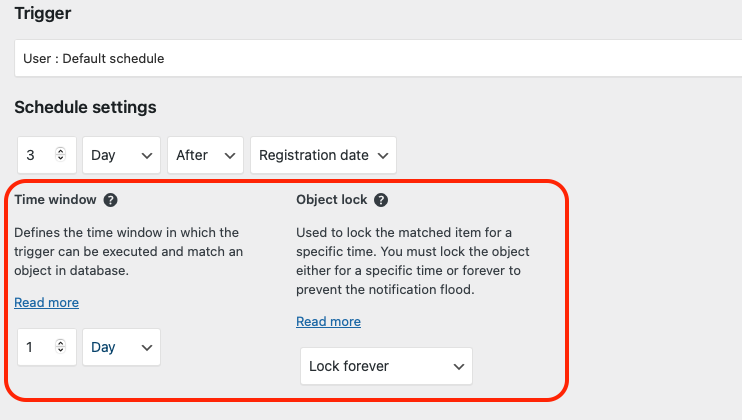
If you want to send a notification 3 days after a user was registered, and the time window is set to 1 day, this will mean that it will match any user registered when the date was between 4 and 3 days ago.
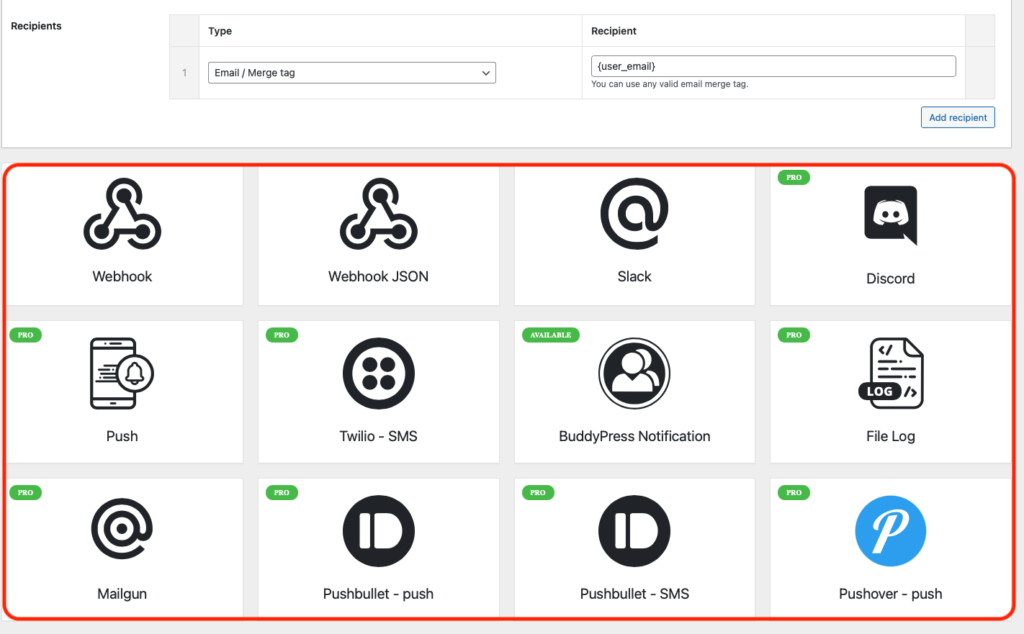
Adding Carriers
Now, just add Carriers. You can add more than one. For example: marketing email for the user, and Discord massage for your marketing team.
- Add a Carrier, in this example, > Email.

- You can add another Carrier to the same Trigger.
Scheduled notifications on WordPress – how we use them
Scheduled Triggers Extensions works best with three predefined object types: User, Post and Page.
In our case, we combine Scheduled Triggers with Custom Fields Extensions, for advanced scenarios. Three hours before the post deadline, our content team receives Slack notification.
To give you a different example: let’s say you add a Scheduled Trigger to notify when posts are still in review after 7 days from adding. This information can be carried as an email to a freelancing proofreader and a Slack notification, to an in-house Content Manager, that this job is overdue.
Money-back Guarantee
WordPress Notification Plugin is and always will be free. Convenient and easy to use, Scheduled Triggers extension cost $69 a year, with a 14-day money-back guarantee and cancel-anytime policy. You also get one year of upgrades and support. The license is transferable. You can also buy extensions in a bundle. Check full pricing HERE.