Promoting events effectively in today’s world means reaching your audience on the platforms they use most.
With the Notification plugin for WordPress, you can set up multichannel notifications across email, push notifications, and Slack, ensuring that each update reaches your audience where they’re most likely to see it.
Notification can help you expand your event’s reach, increase attendee engagement and improve attendance rates by delivering the notifications you need.
Requirements for setting up multichannel notifications on WordPress
To create a multichannel notifications for your events on WordPress, you’ll need these Notification extensions:
- Free Notification Plugin — the core of our plugin, which you can download for free from the plugin repository.
- Notification: Push for real-time desktop notifications,
- Notification: Slack for direct communication with teams or communities,
- Notification: Scheduled Triggers to control notification timing,
- Notification: Custom Fields to personalize event information in messages.
Multichannel event notifications on WordPress with Notification – step-by-step
Eliminate the hassle of manually sending event reminders and create your own, seamless multichannel notifications. This setup helps you engage users more effectively, increasing the likelihood of attendance and building a cohesive experience around your events. This guide is tailored to work seamlessly with Tribe Events, making it easy to manage notifications for events on your site. However, these steps are flexible and can be adapted for use with any other event plugin, ensuring maximum compatibility and convenience.
Let’s dive into each step to set up these automated notifications, so you can simplify your workflow and elevate your event promotion strategy.
Step 1: Configure event triggers for multichannel notifications
1. In your WordPress dashboard, go to Notification > Settings > Triggers.
2. Add your event’s post type to the list of supported triggers, then save your settings to apply updates.

Step 2: Set up notification carriers on WordPress
1. Head to Notification > Settings > Carriers.
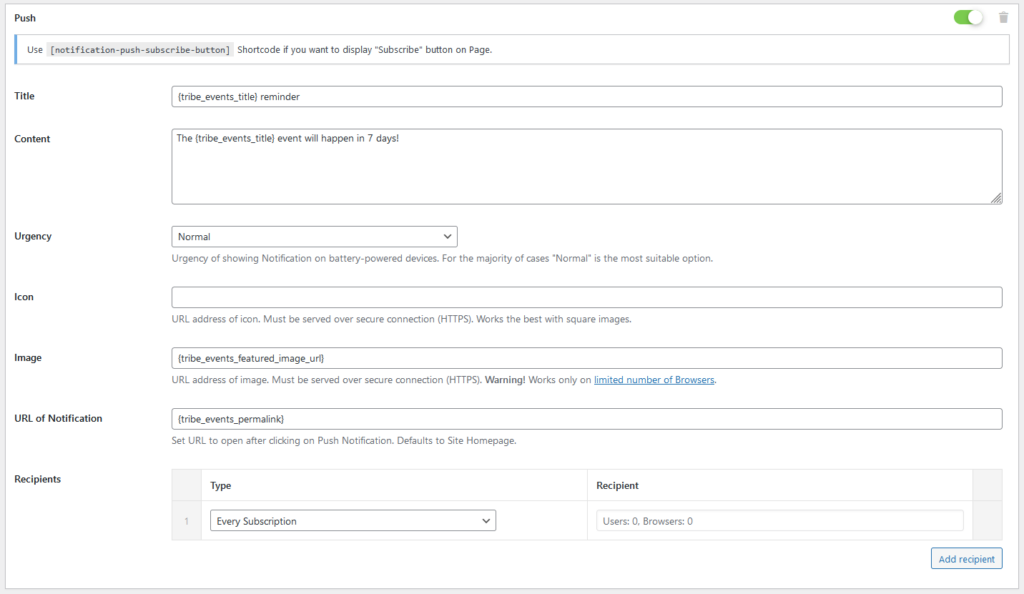
2. Configure the Push carrier by adding your VAPID keys.

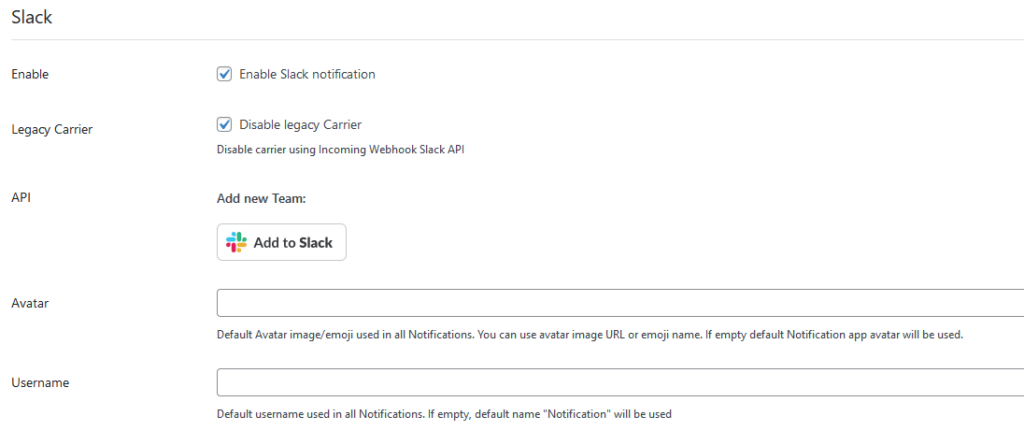
3. Set up Slack by adding your team’s details and selecting the specific channel for your event notifications.

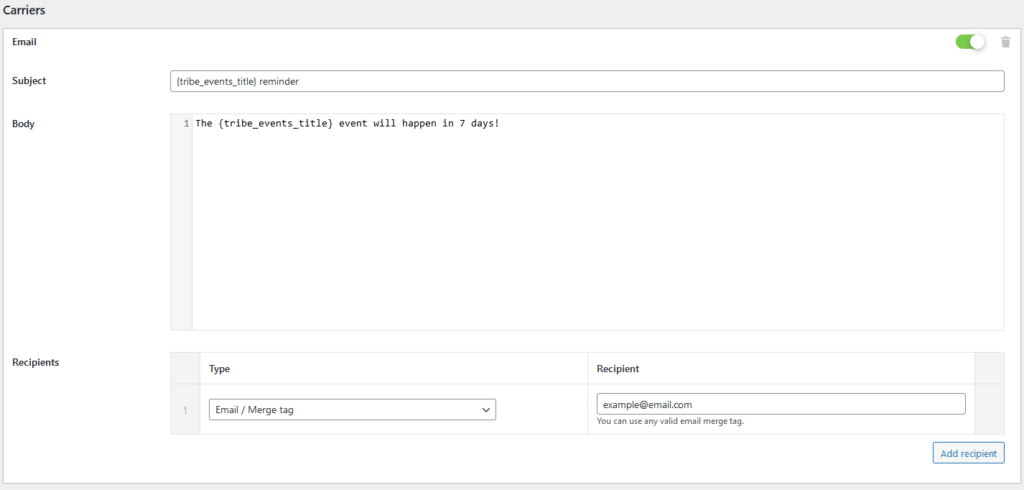
4. Configure your Email carrier if it isn’t set up already.
Step 3: Create a new multi-channel Event notification
1. From your dashboard, create a new notification.
2. Select Scheduled: Event as the trigger, linking it to the event’s start date.

3. Set up your schedule to send reminders a few days or hours before the event, keeping your audience well-informed and ready to attend.

Step 4: Customize notifications for each channel (Email, Slack, Push)
1. Choose the email carrier

2. Add event details (date, time, location) using merge tags to personalize the message.

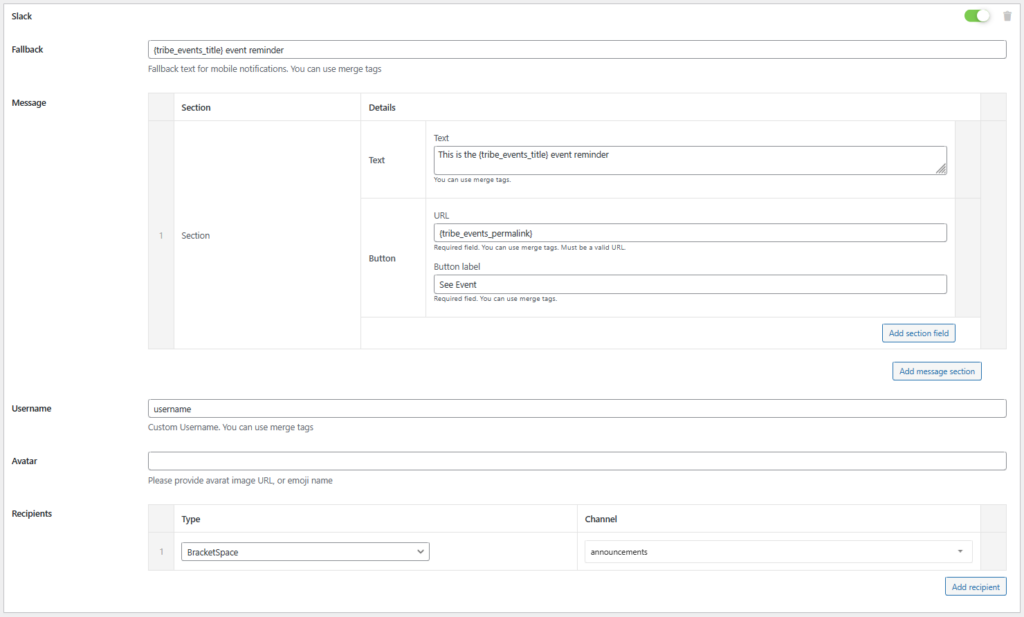
3. Add Slack as a carrier,

4. Customize the message content, and select the channel.
5. You can tag specific users or roles to ensure the message reaches the right people.

6. Lastly, select the Push carrier.

7. Write a brief, engaging message that delivers essential event details succinctly for easy access.

Step 5: Save and deploy your multichannel notification
Once everything is set up, save the notification. Notification will now handle all your event promotions, automatically sending reminders via email, Slack, and push notifications at your specified times.
How Notification streamlines event promotion on WordPress
With Notification, promoting events from your WordPress site becomes an automated, multichannel experience, reaching your audience seamlessly across platforms like email, push notifications, Slack, and much more.
For larger events, integrating with SendGrid guarantees reliable, high-volume email delivery. Together, these tools transform WordPress into a powerful event marketing hub, maximizing engagement and attendance.
Setting up multichannel notifications with the Notification plugin for WordPress provides a powerful way to promote events and more.
