
Notification : PRO All-In Bundle
Loading... / YEAR
Not satisfied with default WooCommerce emails? Make your WooCommerce automated emails stand out. Customize email templates and add triggers with these 3 easy to implement solutions.
In this blog post, you’ll learn:
- Why it’s crucial to customize WooCommerce emails.
- How to do that using global settings.
- How to customize WooCommerce messages using web code.
- How to make custom and automated emails with the Notification Plugin
With WooCommerce, you get two default types of emails:
- Transactional emails to customers.
- Notification emails to store administrators.
Transactional emails provide customers with details about their order’s status, for example, confirming a successful payment or order shipment. With WooCommerce emails to administrators, you get information about the order, payments, and your client’s shipping data.
And there is a third possibility of WooCommerce email: Custom Email Notifications.
Why should you Customize your WooCommerce Emails?
The customer’s motivation for reaching your store is interest in your products. But this interest is limited. That’s why creating valid relations with clients turns them from one-time shoppers to engaged, recurring customers.
If your emails are memorable and personal, customers will be more likely to read them and act on them. Research suggests transactional emails are 4x more likely to be opened by customers than your marketing mailshots.
Custom WooCommerce Emails
Custom WooCommerce emails enable you to make entirely new message templates, send them to any recipient, and trigger many events. For example, a ‘back to stock email’ to customers on a waiting list instantly drives sales at the push of a button.
In this article, I’ll show you how to customize WooCommerce emails and, of course, how to create custom email messages to automate your sales growth.
Default WooCommerce Emails
By default, your WooCommerce transactional emails will look like this:
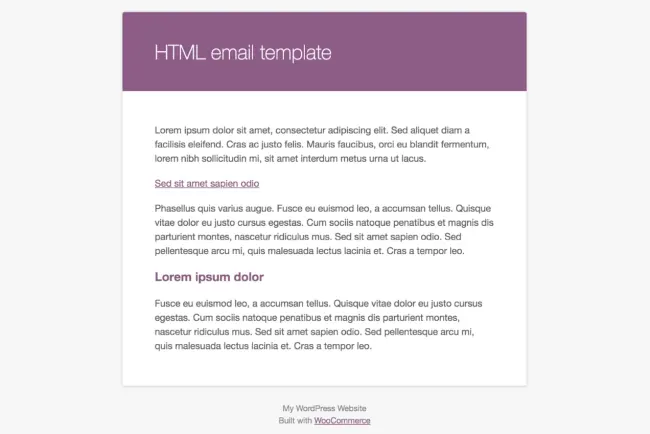
Really, they’re not supposed to send them like this. It’s just a generic starting point from which all WooCommerce store owners can make changes to suit their needs.
A blank canvas. The same is also true of the default email copy, which is bland and needs your personal touch.
Adding your own layout, logo, brand colors, text font, and tone of voice is the least you should do, especially given the positive impact your emails could have on customer interest.
Customizing transactional emails makes the content in them a better fit for your customers. This keeps them better informed on what to expect after making an order, increasing the chances of customer satisfaction and repeat sales. Also, promotional offers coupled with coupon codes can be used to stir up more sales during convenient periods.
On the other hand, adding branding touches to admin emails for staff won’t make a difference to the outcome. But customizing the email content will.
For example, passing on helpful guide notes or processing instructions within order emails is a smart way of reminding your team members of record keeping best practices.
Simply, more useful admin emails lead to frictionless workflows: higher productivity, better outcomes – lower business costs, and more significant profit.
Now, let me show you three methods of WooCommerce email customization. The first uses global settings, the second uses web code, and the third with a suite of plugins designed to bring you ultimate flexibility – opening up many ways to make more profit.
Customizing WooCommerce Emails using Global Settings
Making design changes
To begin customizing your WooCommerce email design, like swapping around the colors and features, you can access the basic controls in the WooCommerce global settings.
- Go to Woocomerce » Settings in your WordPress admin dashboard:
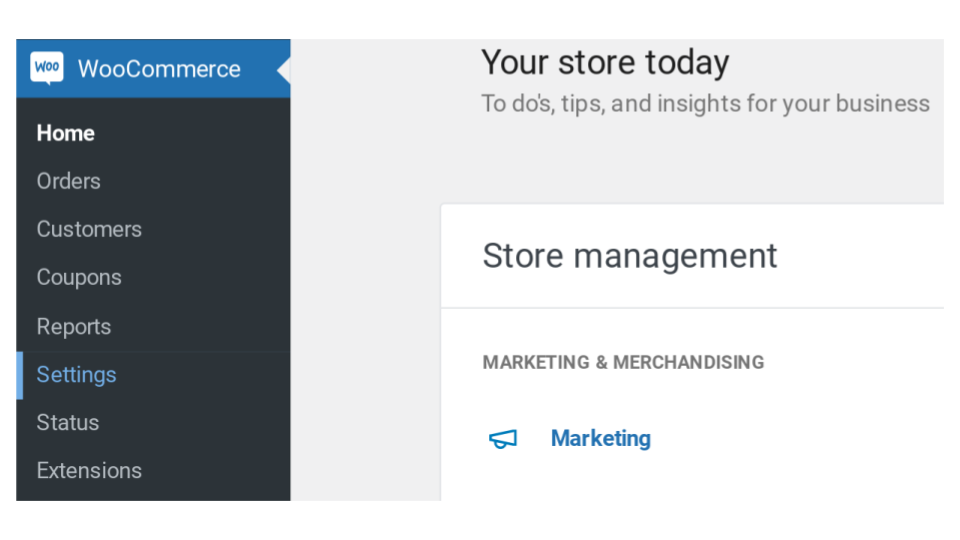
- After clicking, you’ll arrive at the Settings page. The tab you now need is five from the left, called Emails:
- After clicking the Emails tab, you’ll see all the various emails that WooCommerce sends to your staff and customers. Each type of Email is highlighted in blue as a link:
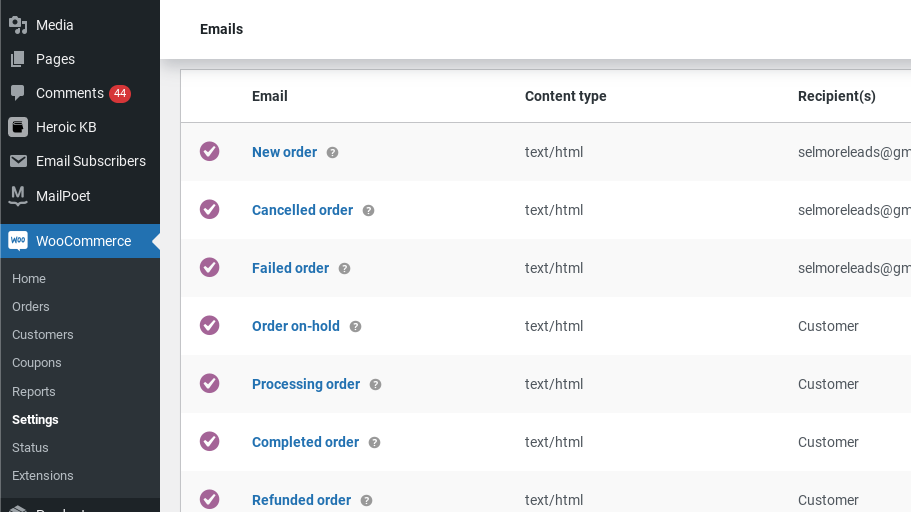 From here, there are two options to customize – Email Sender (where you can define which recipients get which emails) and Email Template (where you can pick the brand color, background, and text colors).
 But if you are looking for a few more options and better control over email features with a more drag-and-drop experience, we recommend you use Mailpoet.
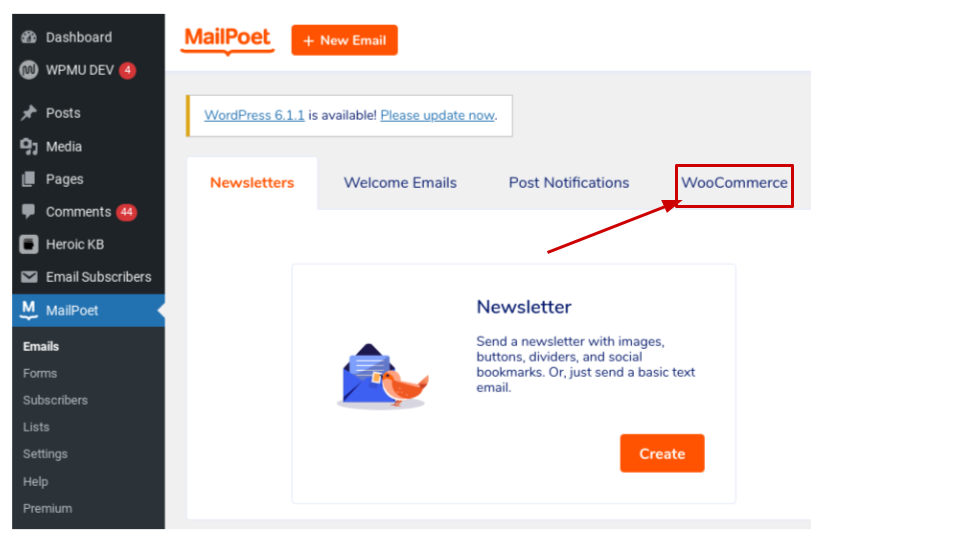
- Simply install the Mailpoet plugin, and within the WordPress admin panel, go to Mailpoet» Emails.

- Having clicked on Emails, you’ll find the WooCommerce email editing options at the furthest right of all the tabs. Click » WooCommerce.
- Next, scroll down the WooCommerce email options and Click » WooCommerce Email Customizer.
- After clicking on WooCommerce Email Customizer, this will load the tool. At the top of the page, a drop down box lets you select the email template you want to customize.
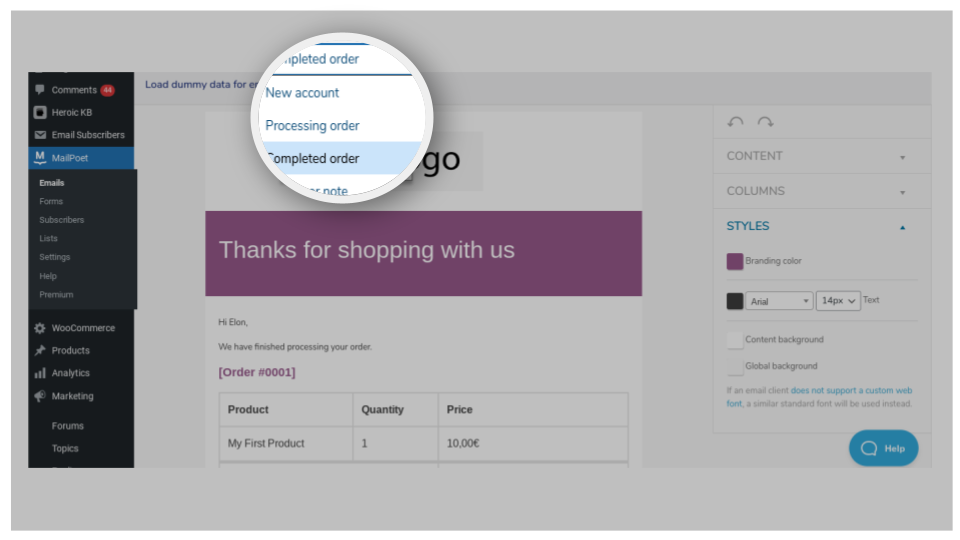 Once you’ve selected the template you want to change, next choose your design preferences under Content, Columns, and Styles.
 Content allows adding text areas, buttons, and more. With Columns, you can change the layout, and then after, you can add custom brand colors and backgrounds under Styles.
Editing text content
8. Returning to WooCommerce » Settings » Email and finding the template you want to edit, click on the ‘Manage’ button to edit text content.
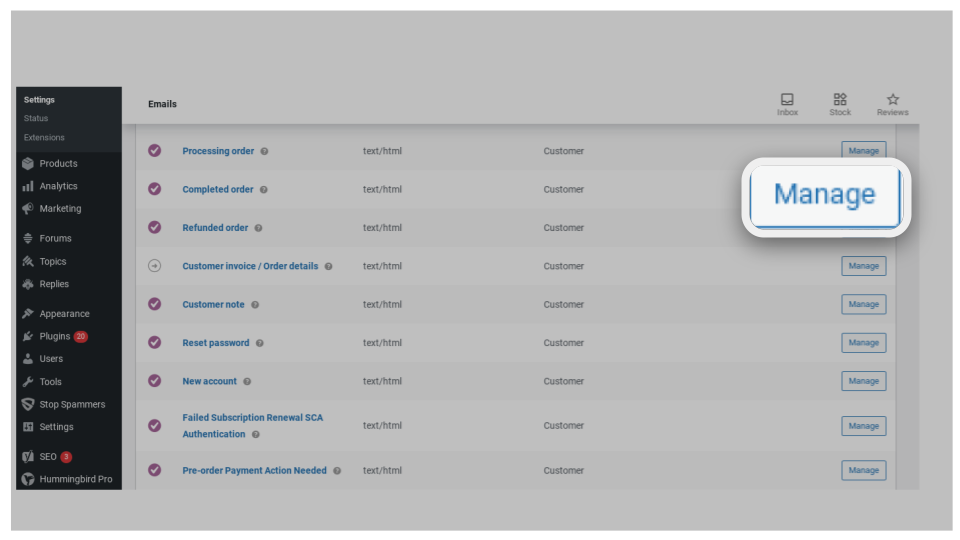
9. Now, you can change the default text and write a personalized message instead, like with this example of the Completed Order email template:
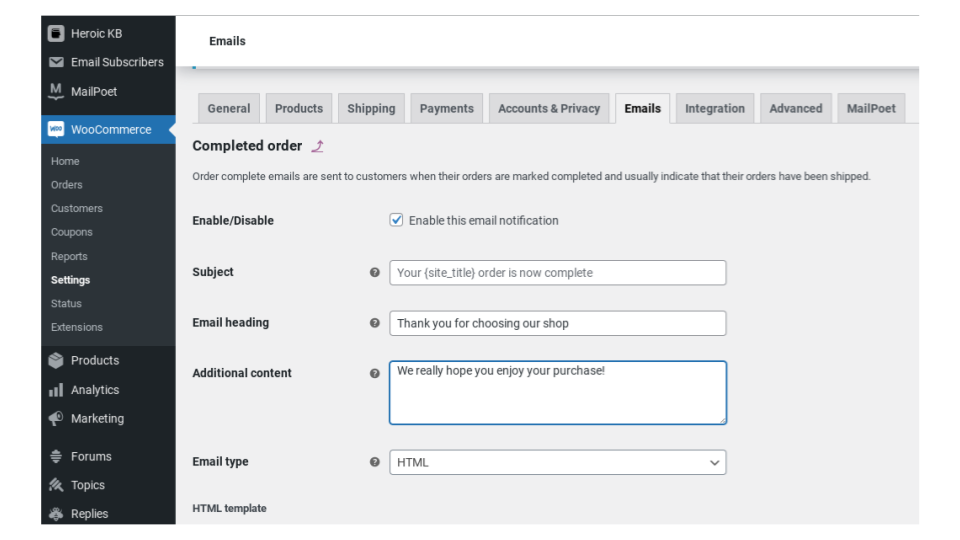
10. Click » Save Changes, and your new email copy is ready to fly.
Making Template Edits using Web Code
Editing code within the PHP templates
For more exact control over your WooCommerce email customization, it is possible to make text edits within the PHP code of each email template.
The first step, copy the chosen template file from the WooCommerce folder into the child theme folder. (By adding your customizations to child theme templates prevents your changes from being overwritten when updates to the parent theme occur. An important step.)
Thankfully, WooCommerce has a built-in shortcut for setting up Woocomerce email templates within your child theme folder. It’s ‘one-click simple.
Go to WooCommerce » Emails and select a template, like Completed Order, for example.
All email templates sit inside the Woocomerce folder.
To make a copy of the template in the folder of your child theme:
- Click » Copy File To Theme button.
Once clicked, open up the template file by going to Appearance » Theme Editor, scrolling down the list go to WooCommerce » Emails. Here you’ll find a copy of that template page.

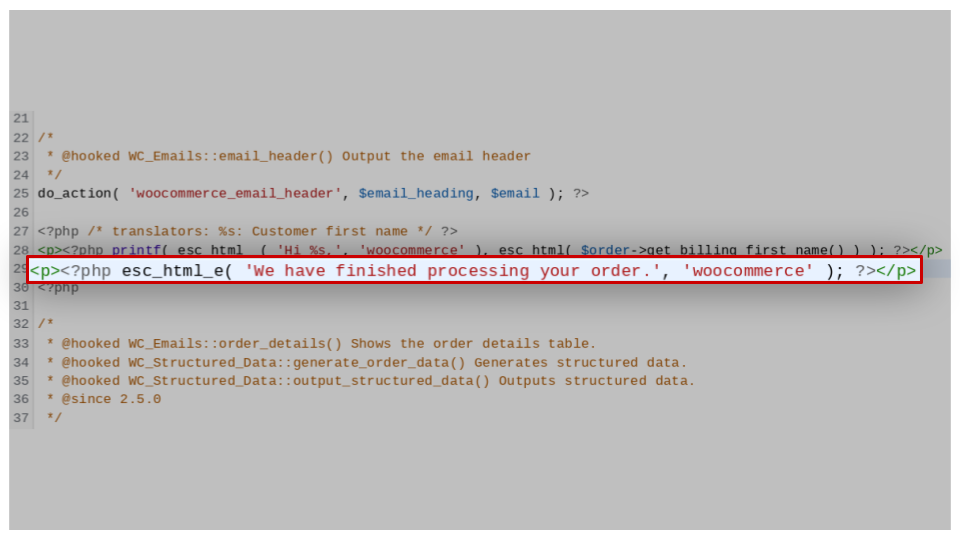
Opening up the page will reveal the PHP code for the template.
You can make your amendments here, like changing text in the email, for example:
The options include, but are not limited to:
- email-header.php (global email header changes)
- email-footer.php (global email footer changes)
- email-styles.php (global email style changes)
- customer-invoice.php (‘customer invoice’ changes)
- customer-processing-order.php (‘customer processing order’ email changes)
Your imagination is the limit.
Adding email content by using WooCommerce Hooks
Custom content can easily be added to the layout of your WooCommerce emails using WooCommerce hooks.
Hooks don’t allow you to edit template text, but they’re a very convenient method of adding custom inserts to your emails.
To do this, you’ll need access to make changes to your WordPress website’s functions.php file.
Once in there, you can insert the relevant hooks for the content you want to add to your WooCommerce emails.
Want to promote the availability of a newly released coupon code on every order email?
Here’s an example of what a hook inserting your promotion above the order table might look like:
add_action( 'woocommerce_email_before_order_table', function ( $order, $sent_to_admin, $plain_text, $email ) {

	echo "<p>Launching: Our new line of sustainably sourced peanuts and corn kernels are now officially 20% off with this coupon code = NUTTY23 (valid until 28th February 2023)</p>";

}, 10, 4 );
There are so many hooks and scenarios where you might use them profitably for your store.
We recommend the WooCommerce Hooks article as the first place to visit for greater detail on this subject.


Customizing Woocommerce Emails using the Notification Plugin
Automate your emails with the Notification plugin
To take your WooCommerce email customization to the next level, you can use the Notification plugin. It’s the #1 plugin in the official WordPress repository for custom notifications.
It’s the most flexible way of sending automated email alerts from your WooCommerce store.
The plugin listens to every action performed within your WordPress website and has an alert possibility to match.
Use the Notification plugin to control your automated emails for running your business and increasing sales.
First, install the Notification plugin. When active, you can go to Notification » Add New Notification to get started.
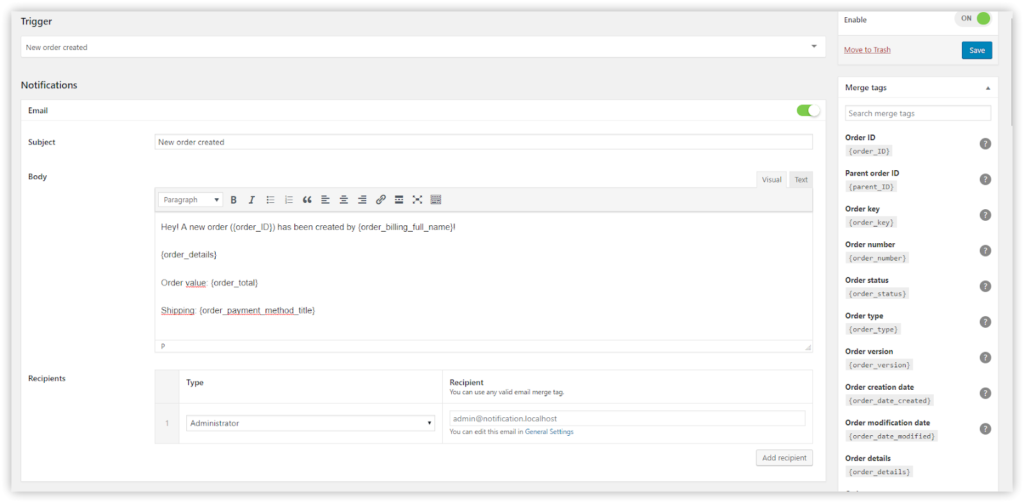
From here, you can set up your first email alert or notification. To begin with, you can add a title to your notification,
- Then, define a certain action within WordPress that should trigger this notification to send,

- Next, select an email carrier
 and also choose from an array of merge tags to insert personalized content dynamically into notification emails:
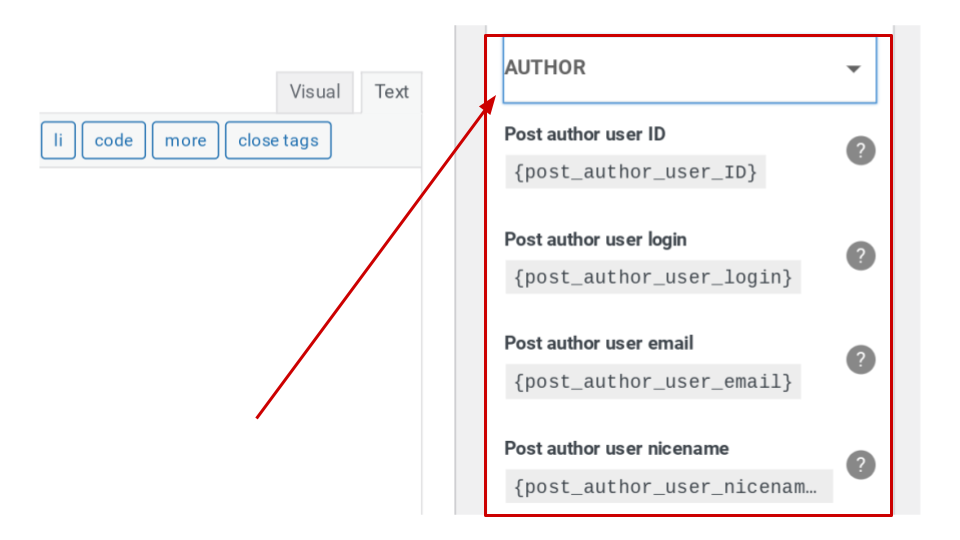
The possibilities at your fingertips for customizing notifications emails with this plugin are dizzying. It’s got everything covered.
So far, that’s the bare bones of what’s on offer. But the Notification plugin doesn’t just leave things there.
It comes with a whole host of extended features. Put together; these give you more automated ‘action/reaction’ email potential (made easy) than you probably thought was possible.
Here are some more ways that the Notification plugin could help you grow your WooCommerce store sales:
Custom Triggers
First, there are custom WooCommerce triggers.
With these, now it’s possible to trigger emails when customers log in, orders are created, products are added or removed from the cart, or when customers write reviews + more.
And, of course, all the related merge tags are available for the insert. Take these order email merge tags below, for example:
With conditional triggers, you can easily add logic rules determining which conditions lead to an email notification being sent. Sprinkle a little imagination on top, and you’ve just taken your WooCommerce business to the next level.
For example, this is how you would set up a notification that offers a discount to the customer who places that 1,000th order with your store:
Simple.
Attachments
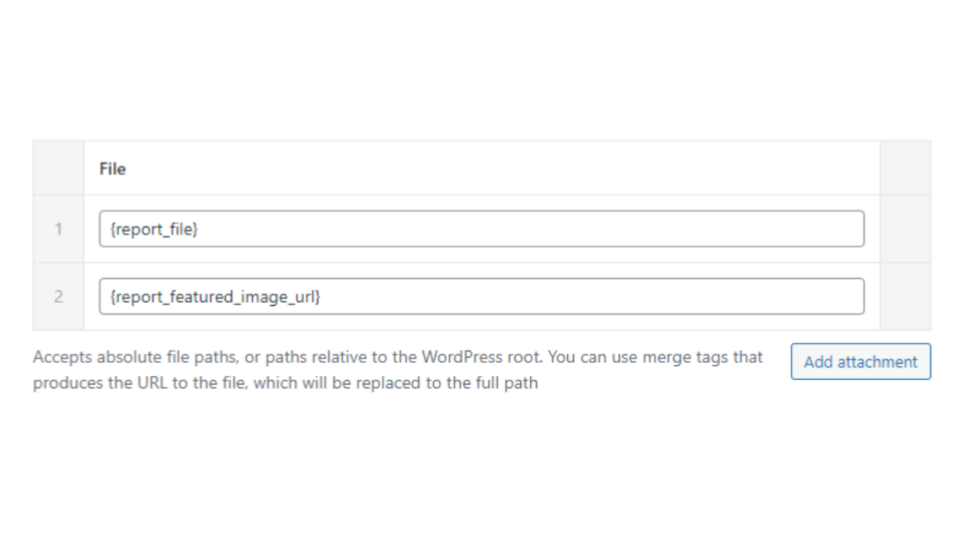
Besides all this, it is also possible to attach attachments to WooCommerce emails using the Notification plugin.
The email attachment extension will neatly package any file uploaded to your WordPress media library within the email.
It’s possible to place inside your WooCommerce emails: PDF brochures, jpg flyers, and more.
For a solid start to using the Notification plugin, you can watch this step-by-step video tutorial.
More than just emails
We hope you can now see the various ways to customize your WooCommerce emails and increase sales – with or without coding experience. You may also want to set up WP Cron email alerts or add custom fields to your notifications.