Notify your customers with personalized, action-driven messages without expensive, 3rd party WooCommerce integration. Create custom notifications inside WordPress – no coding experience required!
In this article, you will learn:
- What’s Notification Plugin,
- What are Carriers and Triggers,
- how to set up custom WooCommerce Notifications.
For e-commerce and marketing, there is a next big thing around the corner every year, yet emails are going strong since… 1971. That being said, email marketing gets increasingly complicated every year, as our inboxes are populated with advertising, unwanted newsletters and, to put it mildly, spam.
That’s the main reason why customizing WooCommerce notifications can benefit your business.
As 2022’ Campaign Monitor study shows, email marketing campaigns still have a great open rate of over 21%, with 2-3% CTR and a minimal 0.1% unsubscribe rate.
We need to separate the two main ideas, even though they work together nicely:
- Custom WooCommerce emails – it’s a way of customizing default emails. We have a separate tutorial for that 👉 WooCommerce Email Customization
- Custom WooCommerce notifications – customized scenarios, when and how emails (or different notifications, for example, push notifications) are sent.
With the Notification Plugin, you can do both, so be sure to check out the rest of this blog post below!
First off: what’s Notification Plugin?
You may be asking yourself: what’s the Notification Plugin and why the hell do I need to install it for WooCommerce notifications?
Notification Plugin is a free, cron-based automation plugin that helps you create YOUR WordPress notifications. It works with different Carriers, like Slack, Push, Mailgun (+many more!), and different Triggers. In the basic, free version of Notification Plugin, you can work with email.

Notification : PRO All-In Bundle
Loading... / YEAR
What are Carriers?
Carriers are receivers of information / notifications. The current list of Carriers contains:
To get an idea of how Carriers work, imagine receiving a WordPress notification in Slack every time your freelance copywriter adds a post for review.
Simple, right?
What are Tiggers?
Triggers are the starting point of actions. For example, a certain product added to WooCommerce cart can trigger an email notification to shop administrators. Or the other way around: products in cart can trigger a push notification to a customer (example: “Just $10 to free shipping!”). WooCommerce’s triggers are placed in 4 groups:
Customer
- Customer logged in
- Customer logged out
- Customer profile updated
Order
- Order created
- Order completed
- Order in progress
- Order Updated
Product
- Product added
- Product added to cart
- Product removed from cart
- Product updated
Review
- Review added
- Review approved
- Review unapproved
You can combine different Triggers and Carriers, so the possibilities are endless!
Custom WooCommerce Notifications – setting up
Let’s start setting up our custom WooCommerce notifications center. To achieve that, first install the Notification Plugin:
1. Installing Notification Plugin
Open your WordPress dashboard and choose > Plugins on the left sidebar.
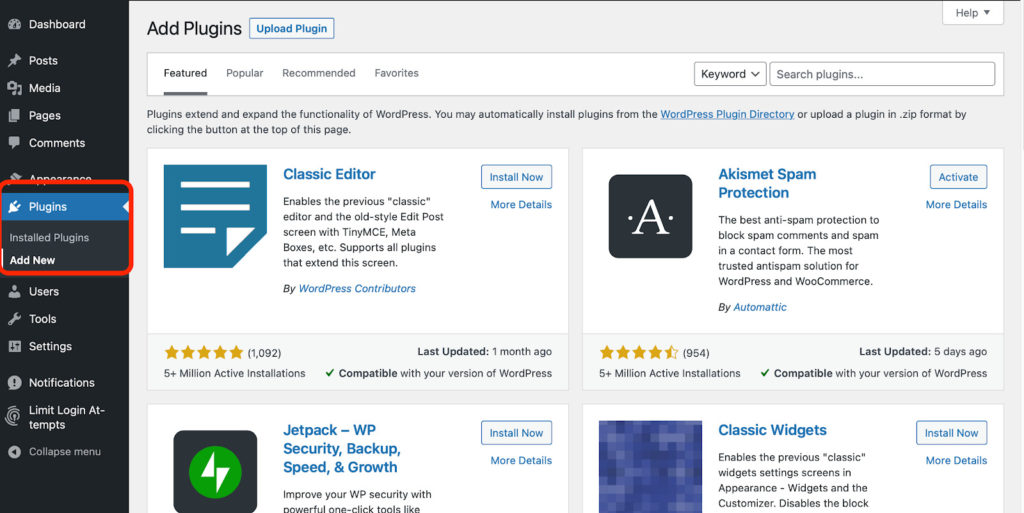
Alt text: WordPress admin dashboard, Plugins menu in the sidebar.
Caption: You can add a Notification Plugin using the Plugins’ sidebar on WordPress.
Type in Notification Plugin in the search bar. 10,000+ active installations and great reviews – that’s ours:
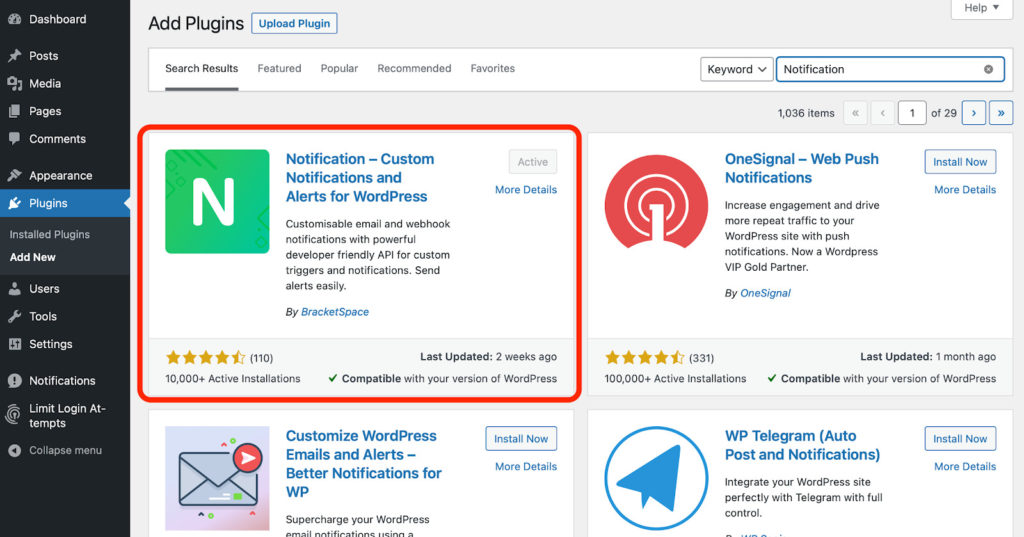
Alt text: Notification Plugin in WordPress Plugins.
After installation, activate the plugin. You can check how the Notification Plugin works with free Carriers.
2. Adding WooCommerce Extension
Now, you need to add an extension. Open the Notifications’ menu from the sidebar. You can find your notifications, settings, and extensions there:
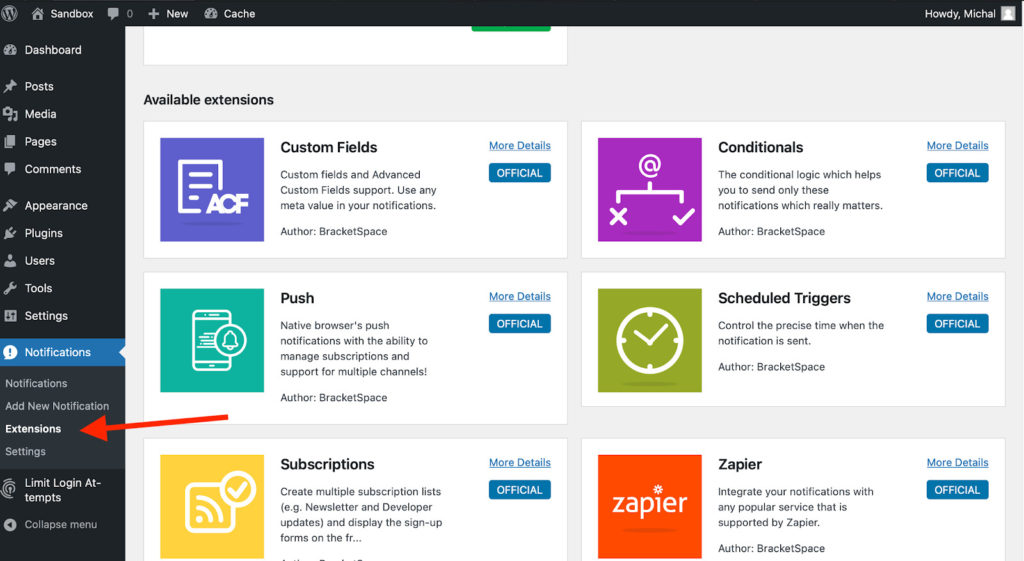
Alt text: Adding Notification Plugin extension from WordPress sidebar.
Click Extensions and select WooCommerce. Selecting More Details will transfer you to BracketSpace’s plugin page, where you can purchase.
- Yes, Extensions are paid, but we have a fair pricing policy, a 14-day money-back guarantee, and you can also buy them in a Bungle.
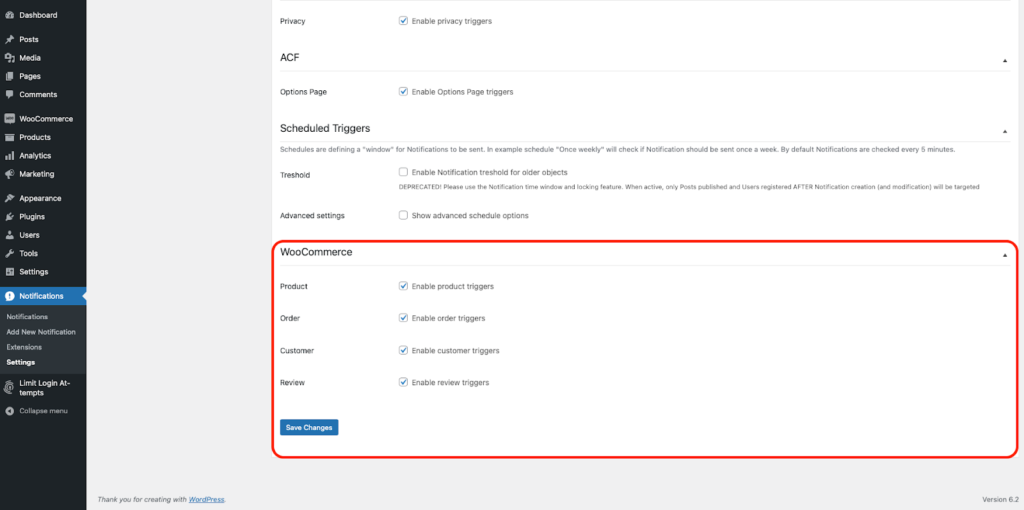
Setting up the WooCommerce Extension
After activating WooCommerce Extension, you have few options in the Setting menu.
- Open > Settings of Notification Plugin from the sidebar and pick > Triggers.

- Choose > WooCommerce from the bottom of the menu. You can enable or disable different types of Triggers.
Real-life Use Case
Let’s put our system to work! We’ll create an exemplary scenario, with simple email notifications triggered by new WooCommerce reviews.
- Remember: there is almost no limit for creating scenarios. Specify your needs, combine extensions, build and deploy!
Adding New Notification
- Open > Add New Notification from the sidebar.
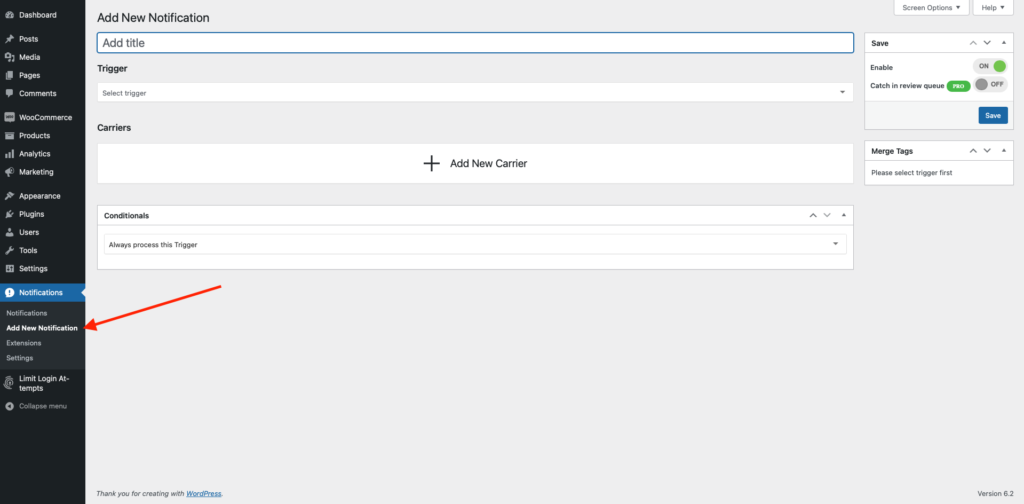
- Start with adding a name to a notification. Names help to organize future work.
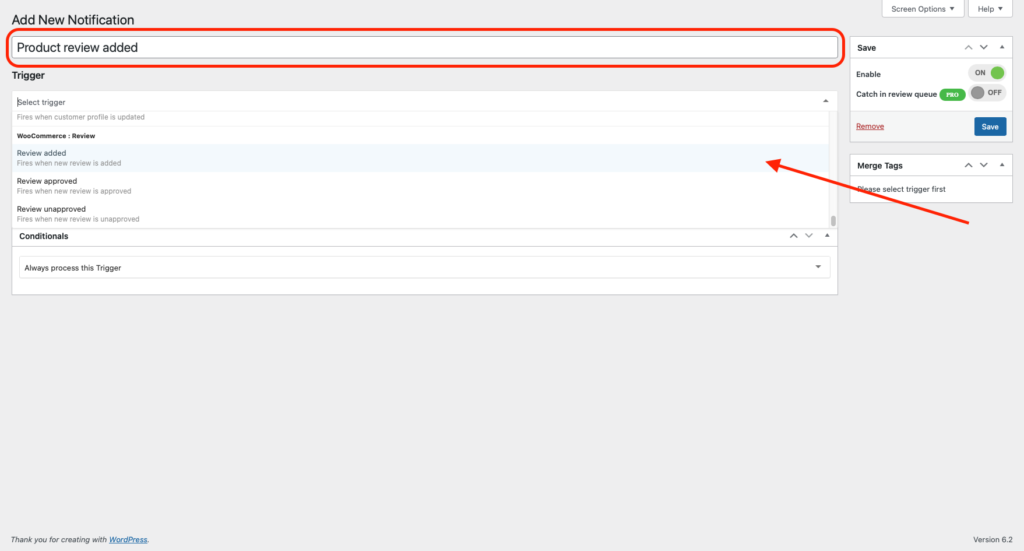
3. Choose > Trigger. In this example, we will select > Review added.
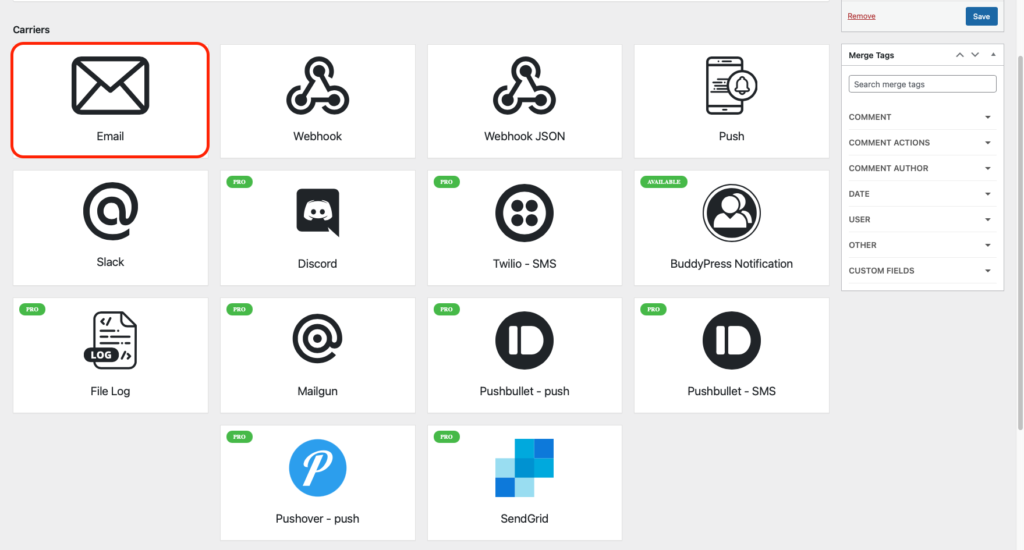
4. Add > Carrier. You can pick from a variety of Carriers and combine them. In this example, we’ll use simple email.
5. Add > Subject and contents of the message.
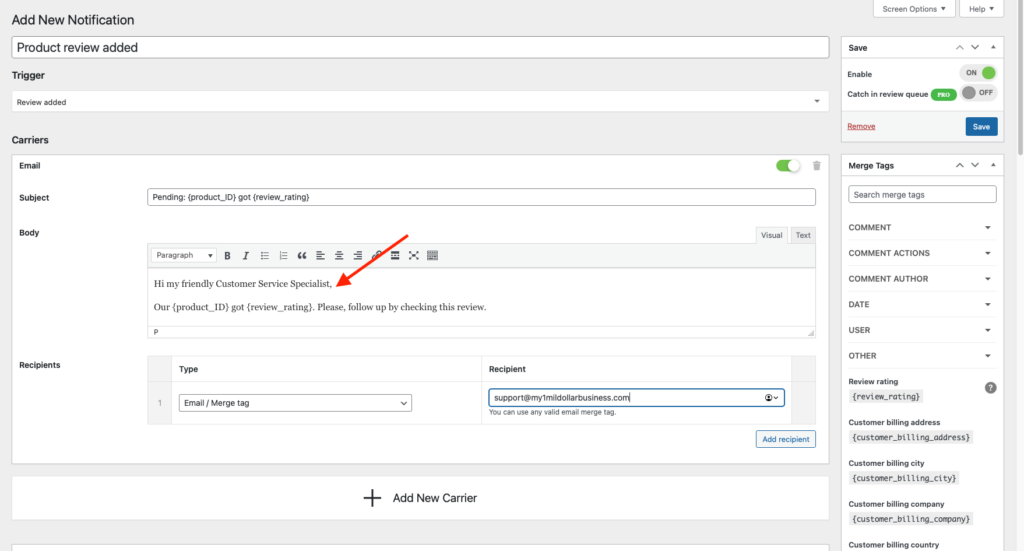
6. Click > Save… and you’re ready to go!
WooCommerce’s Notifications Made Easy
The best part of the Notification Plugin and its extensions is the fact that they work together beautifully. You can combine WooCommerce Extension with Conditionals or Scheduled Triggers, for control on a granular level. You can add different Carriers to one Trigger, to keep everybody in touch.
These easy-to-execute, custom solutions are your tactical advantage over your e-commerce competitors. And the best part? You can deploy them yourself, no coding, external agency, pricey integration or experience is needed.
And hey, if you don’t find value in a particular Extension – our 14-day money-back guarantee keeps you covered.
P.S. WooCommerce Extension needs WooCommerce >= 3.4 and Notification Plugin >= 6.0.0 plugins.